LOFT-Q Quick Guide for Lebacy Kernel
| Organization: | Mixtile Team |
|---|---|
| Version: | 0.1 |
| Date: | 2015.01.23 |
Note
Lebacy kernel is based on the customized kernel by AllWinner, and We advice that it only be used with Android and Buildroot, as it doesn’t include some new features that newer GNU/Linux systems need.
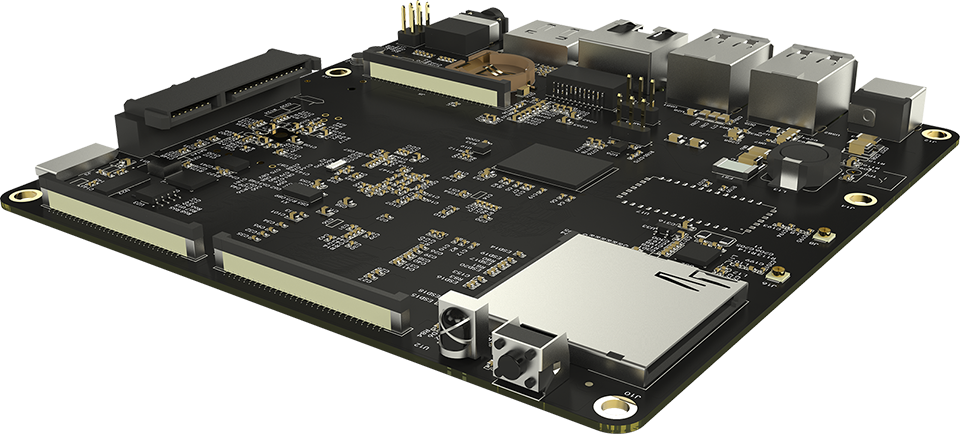
LOFT-Q is the second prototyping board of Mixtile project. Based on AllWinner A31 SOC, designed for embedded developers, engineers, makers and hackers, it can be used as home media center, personal could device, NAS, etc. This guide will help developers quickly building the environment, compiling usable os and customizing you own application.
Lebacy Build Environment
The board has burned with the latest stable os when you get it. And if you want to customize the board add your own external devices, you will have to rebuild your own system image, then you will have to make some preparation as below.
The Legacy kernel mainly used for building system as below:
- Buildroot
- Android
The code we need to prepare includes:
- Building tools: https://github.com/mixtile/sunxi-build
- Legacy kernel: https://github.com/mixtile/a31-linux
- Legacy u-boot: https://github.com/mixtile/a31-uboot
- android: http://www.mixtile.com/downloads/loft-q/ (tartall suggested: loftq_android_20150407.tar.bz2)
- buildroot: https://github.com/mixtile/buildroot
And the structure layout for building as below:
android
sunxi-build
a31-linux
a31-uboot
we can build the layout above with commands:
mkdir loftq
cd loftq

git clone https://github.com/mixtile/sunxi-build.git
git clone https://github.com/mixtile/a31-uboot.git
git clone https://github.com/mixtile/a31-linux.git
git clone https://github.com/mixtile/buildroot.git
About sunxi-build
sunxi-build contains the srcipts and tools for building uboot, linux, android, and packing system image.
Before accurately building, we will have to import the building environments to current working command line.
source sunxi-build/mixtile_loftq_env.sh
After environment importing, we can start compiling instructions, such as building uboot for linux:
linux_build_uboot
About mixtile_loftq_env
mixtile_loftq_env.sh is the env importing script for LOFT-Q, working as the lunch script for Android. it will import environment variables and compiling instructions to current working shell.
At the front, it’s the definations of the repository paths for uboot, linux, buildroot and android, developers could make some modifitations according to their own configurations. The following the the original configs:
export BUILD_TRUNK=$(pwd)
export BUILD_TRUNK_OUT=$BUILD_TRUNK/out_loftq

# envs for sunxi tools
export SUNXI_TOOLS_PATH=$(pwd)/sunxi-build
export SUNXI_LINUX_PATH=$(pwd)/a31-linux
export SUNXI_UBOOT_PATH=$(pwd)/a31-uboot
export SUNXI_TOOLCHAIN_PATH=${SUNXI_TOOLS_PATH}/toolschain/gcc-linaro/bin/

# envs for android
export ANDROID_TRUNK=$(pwd)/android
export ANDROID_DEVICE=loftq
export ANDROID_DEVICE_TRUNK=${ANDROID_TRUNK}/device/mixtile/${ANDROID_DEVICE}

# envs for ubuntu touch
# only used if we have android base sdk released by ubuntu touch team
# Note: now we can build this image but can't burn it to disk with PhoenixTool
export UBUNTU_OUTPUT=$BUILD_TRUNK_OUT/ubuntu
export UBUNTU_TARBALL=$UBUNTU_OUTPUT/vivid-preinstalled-touch-armhf.tar.gz

# commom env
export ANDROID_OUT=${ANDROID_TRUNK}/out
export ANDROID_DEVICE_OUT=${ANDROID_OUT}/target/product/${ANDROID_DEVICE}

export LINARO_GCC_PATH=$SUNXI_TOOLCHAIN_PATH
export PATH=$PATH:$LINARO_GCC_PATH
And developers can also add their own compiling instructions, sample as linux_build_uboot :
function linux_build_uboot()
{
    CURDIR=$PWD

    cd $SUNXI_UBOOT_PATH
    make distclean
    make sun6i_config
    make -j4
    cd $CURDIR
}
Legacy Uboot Building
As for building of uboot, we have two methods. we can build it with predefined building instruction in mixtile_loftq_env and follow the manual commands step by step.
Predefined building
we have predefined building instructions uboot for android and linux.
Uboot for Linux
linux_build_uboot
Uboot for Android
android_build_uboot
Manually building
Manually building is just the seperate instructions of predefined instruction. Commands as below:
make distclean
make sun6i_defconfig
make -j4
Legacy Linux Kernel Building
Note
As for the Legacy linux kernel, we advice it to be used only for Android system.
Now the kernel we use is based on the cuszomized version by Allwinner for A31 soc, whihc is linux 3.3 . this version contains the drivers and configurations for both android and common linux releases, and we can compile kernel for both GNU/Linux and Android.
Predefined building
sunxi-build also provides predefined instructions for kernel building.
kernel for GNU/Linux
linux_build_kernel
kernel for Android
android_build_kernel
Manually building
Manually building for kernel will be a little complex, which needs external toolchain support.
toolchain importing
export SUNXI_TOOLS_PATH=$(pwd)/sunxi-build
export SUNXI_TOOLCHAIN_PATH=$SUNXI_TOOLS_PATH/toolschain/gcc-linaro/bin/
export PATH=$PATH:$SUNXI_TOOLCHAIN_PATH
Developers can add these variables according to own path definations.
kernel building for GNU/Linux
cd a31-linux
make distclean
./build.sh -p sun6i
kernel building for Android
cd a31-linux
make distclean
./build.sh -p sun6i_fiber
Buildroot building
Buildroot is a simple, efficient and easy-to-use tool to generate embedded Linux systems through cross-compilation.
Getting source
Now we have the latest buildroot support, developers can download the code from our github repository, which will bee updated with the official repository.
git clone https://github.com/mixtile/buildroot.git
Compiling buildroot
After downloading source, we can begin compiling buildroot.
make mixtile_loftq_defconfig
make
Note
- When building with make, it will try to downlaod all the code of package configured, also some temp files will be generated, so before building, it’s necessary to prepare enough disk space according to number of packages, or it may cause building failed.
- after building finished, there will be output/images at the root building directory.
Packing image
This step is packing image, we will have to put rootfs.ext4 generated in previous step into the specified directory $BUILD_TRUNK/out/linux and then run cmds:
linux_pack
As for linux image packing, it will show one prompt session as below:
nano@vps:~/mixtile/loftq$ linux_pack
Generating linux out directory!
Copiing uboot!
Copying linux kernel and modules!
Packing final image!
Start packing for Lichee system

All valid chips:
0. sun6i
Please select a chip:
then enter 0 for choosing sun6i, the next session for os :
All valid platforms:
0. android
1. dragonboard
2. linux
Please select a platform:
Now, we use linux, so enter 2 for linux, and then:
All valid boards:
0. aw_w01
1. aw_w02
2. evb
3. loftq
4. loftq_suse
5. qc
Please select a board:
we use loftq, so enter 3, maybe the options list will vary with time. so choose the specified option according to your request. and then it will continue packing according to your selections, screen info as below:
....

c:\bat
c:\magic.bin
find magic !!
RealLen=0x5A5C00
CPlugin Free lib
CPlugin Free lib
get rootfs from ../../../out/linux
compute signature for datafile /home/nano/mixtile/loftq/sunxi-build/pack/out/boot.fex
/home/nano/mixtile/loftq/sunxi-build/pack/pctools/linux/eDragonEx/
/home/nano/mixtile/loftq/sunxi-build/pack/out
Begin Parse sys_partion.fex
Add partion bootloader.fex BOOTLOADER_FEX00
Add partion very bootloader.fex BOOTLOADER_FEX00
FilePath: bootloader.fex
FileLength=5a5c00 FileSizeHigh=0
Add partion env.fex ENV_FEX000000000
Add partion very env.fex ENV_FEX000000000
FilePath: env.fex
FileLength=20000 FileSizeHigh=0
Add partion boot.fex BOOT_FEX00000000
Add partion very boot.fex BOOT_FEX00000000
FilePath: boot.fex
FileLength=dac800 FileSizeHigh=0
Add partion rootfs.fex ROOTFS_FEX000000
Add partion very rootfs.fex ROOTFS_FEX000000
FilePath: rootfs.fex
FileLength=8327800 FileSizeHigh=0
BuildImg 0
Dragon execute image.cfg SUCCESS !
---------image is at-------------

 /home/nano/mixtile/loftq/sunxi-build/pack/sun6i_linux_loftq.img

pack finish
/home/nano/mixtile/loftq/sunxi-build/pack/sun6i_linux_loftq.img is the target image that we need. And next, we can burn this image to sdcard for installing or booting with PhoenixCard.
Note
PhoenixCard is the tool provided by Allwinner for burning sdcard for booting or factory installing, which is only for windows platform. so we can’t fully be free, and with mainline kernel or uboot, we can fly without this tool ;) , but for now, we still need this.
Customizing
We have preadded packages in configuration file, also developers can add or delete them according to requirement. Commands as below:
make menuconfig
menuconfig needs some extra libs or commands support, it you have been warned something missed, you can install them according to the prompting infomation.
More Information
Sites of Buildroot:
- Official site: http://buildroot.uclibc.org
- Documents: http://buildroot.uclibc.org/docs.html
Android building
The android source is based on Android 4.4.2 provided by Allwinner with drivers for bluetooth, wifi, spdif, inner disk and more. The source tarball needs really much space that we can’t afford it with one single code repository, so later, we will release latest code archive in our site. And for now we have one repository for Android code, because of its big body, only readable for downloading.
Building steps as below:
enter android directory.
cd androidbuild uboot for android with predefined instruction.
android_build_uboot
build kernel for android with predefined instruction.
android_build_kernel
build android project.
source build/envsetup.sh
lunch mars_loftq-eng
android_extract_bsp
make -j16
android_pack
Android image packing process is similiar to the Buildroot packing, when it’s finished, it will print the final path of target image, then you can burn it will PhoenixTool with booting mode or factory production mode.